
Python으로 개발한 이미지 스티칭.
먼저 스티칭(stitching)이란 여러 개의 이미지, 또는 영상을 이어 붙이는 작업을 말한다. 요새 핫한 VR 카메라도 이 스티칭 기술을 통하여 자연스럽게 이어 붙여 영상을 만드는 것이라고 알고 있다.
우선 필요한 라이브러리들을 설명하자면
Opencv4.3, Opencv-contrib4.3, PyQt5, imutils 정도가 필요하다.
아 PyQt5는 그냥 내가 GUI 이쁘게 만들어서 인터페이스 창으로 실행하고 싶어서 썼다. 굳이 필요 없음
pyimagesearch 다음 페이지를 참고하여 만들어 보았다.
https://www.pyimagesearch.com/2018/12/17/image-stitching-with-opencv-and-python/
Image Stitching with OpenCV and Python - PyImageSearch
In this tutorial you will learn how to perform multiple image stitching using Python, OpenCV, and the cv2.createSticher and cv2.Stitcher_create functions.
www.pyimagesearch.com
코드
전체 코드 보기
import numpy as np
import cv2
import imutils
import sys
from PyQt5 import QtCore
from PyQt5.QtWidgets import *
from PyQt5.QtCore import *
from PyQt5.QtGui import *
from imutils import paths


class Mainwindow(QMainWindow):
    def __init__(self, parent=None):
        super(Mainwindow, self).__init__(parent)

        self.directory = QLineEdit(self)
        self.directory.setGeometry(QtCore.QRect(40, 50, 250, 20))
        self.directory.setPlaceholderText("Please select a folder to stitch.")
        self.directory.setReadOnly(True)

        self.dir_btn = QPushButton(self)
        self.dir_btn.setText("Select")
        self.dir_btn.setGeometry(QtCore.QRect(310, 50, 60, 20))
        self.dir_btn.clicked.connect(self.dir_click)

        self.dir_lab = QLabel(self)
        self.dir_lab.setText("[Images directory]")
        self.dir_lab.setGeometry(QtCore.QRect(140, 20, 110, 20))

        self.output = QLineEdit(self)
        self.output.setGeometry(QtCore.QRect(40, 130, 250, 20))
        self.output.setPlaceholderText("Please select a output directory.")
        self.output.setReadOnly(True)

        self.out_btn = QPushButton(self)
        self.out_btn.setText("Select")
        self.out_btn.setGeometry(QtCore.QRect(310, 130, 60, 20))
        self.out_btn.clicked.connect(self.out_click)

        self.out_lab = QLabel(self)
        self.out_lab.setText("[Output directory]")
        self.out_lab.setGeometry(QtCore.QRect(140, 100, 110, 20))

        self.out_name = QLineEdit(self)
        self.out_name.setGeometry(QtCore.QRect(40, 170, 250, 20))
        self.out_name.setPlaceholderText("Please enter output file name.")
        self.out_name_lab = QLabel(self)
        self.out_name_lab.setText("ex) output1.png")
        self.out_name_lab.setGeometry(QtCore.QRect(40, 190, 130, 20))

        self.crop_lab = QLabel(self)
        self.crop_lab.setText("[Images Cropping]")
        self.crop_lab.setGeometry(QtCore.QRect(140, 220, 120, 20))

        self.crop = QComboBox(self)
        self.crop.setGeometry(QtCore.QRect(125, 250, 140, 20))
        self.crop.addItems(["NO", "YES"])

        self.stitch_btn = QPushButton(self)
        self.stitch_btn.setText("Stitch!")
        self.stitch_btn.setGeometry(QtCore.QRect(100, 300, 200, 80))
        self.stitch_btn.clicked.connect(self.SIFT)

        self.setGeometry(800, 300, 400, 400)
        self.setWindowTitle("Image Stitching")
        self.setWindowIcon(QIcon('logo.png'))
        self.show()

    def dir_click(self):
        input = QFileDialog.getExistingDirectory(self, 'Open Folder', 'C:/Users/user/PycharmProjects/untitled')
        self.directory.setText(input)

    def out_click(self):
        output = QFileDialog.getExistingDirectory(self, 'Open Folder', 'C:/Users/user/PycharmProjects/untitled')
        self.output.setText(output)

    def SIFT(self):
        output_dir = self.output.text() + "/" + self.out_name.text()
        print(output_dir)

        self.stitch_btn.setText("[INFO] loading images...")
        imagePaths = sorted(list(paths.list_images(self.directory.text())))
        images = []

        for imagePath in imagePaths:
            image = cv2.imread(imagePath)
            images.append(image)

        self.stitch_btn.setText("[INFO] stitching images...")
        stitcher = cv2.createStitcher() if imutils.is_cv3() else cv2.Stitcher_create()
        (status, stitched) = stitcher.stitch(images)

        if status == 0:
            if self.crop.currentText() == "YES":
                self.stitch_btn.setText("[INFO] image cropping...")
                stitched = cv2.copyMakeBorder(stitched, 10, 10, 10, 10,
                                              cv2.BORDER_CONSTANT, (0, 0, 0))

                gray = cv2.cvtColor(stitched, cv2.COLOR_BGR2GRAY)
                thresh = cv2.threshold(gray, 0, 255, cv2.THRESH_BINARY)[1]

                cnts = cv2.findContours(thresh.copy(), cv2.RETR_EXTERNAL,
                                        cv2.CHAIN_APPROX_SIMPLE)
                cnts = imutils.grab_contours(cnts)
                c = max(cnts, key=cv2.contourArea)

                mask = np.zeros(thresh.shape, dtype="uint8")
                (x, y, w, h) = cv2.boundingRect(c)
                cv2.rectangle(mask, (x, y), (x + w, y + h), 255, -1)
                minRect = mask.copy()
                sub = mask.copy()

                while cv2.countNonZero(sub) > 0:
                    minRect = cv2.erode(minRect, None)
                    sub = cv2.subtract(minRect, thresh)

                cnts = cv2.findContours(minRect.copy(), cv2.RETR_EXTERNAL,
                                        cv2.CHAIN_APPROX_SIMPLE)
                cnts = imutils.grab_contours(cnts)
                c = max(cnts, key=cv2.contourArea)
                (x, y, w, h) = cv2.boundingRect(c)

                stitched = stitched[y:y + h, x:x + w]

            cv2.imwrite(output_dir, stitched)
            self.stitch_btn.setText("Stitch!")

        else:
            print("[INFO] image stitching failed ({})".format(status))


if __name__ == '__main__':
    import sys
    from PyQt5.QtWidgets import QApplication

    app = QApplication(sys.argv)
    ui = Mainwindow()
    ui.show()
    sys.exit(app.exec_())
코드 설명
    def dir_click(self):
        input = QFileDialog.getExistingDirectory(self, 'Open Folder', 'C:/Users/user/PycharmProjects/untitled')
        self.directory.setText(input)

    def out_click(self):
        output = QFileDialog.getExistingDirectory(self, 'Open Folder', 'C:/Users/user/PycharmProjects/untitled')
        self.output.setText(output)
이미지 경로에 대한 버튼이다.
QFileDialog 클래스의 getExistingDirectory 함수를 사용하면 파일의 경로를 지정할 수 있다.
    def SIFT(self):
        output_dir = self.output.text() + "/" + self.out_name.text()
        print(output_dir)

        self.stitch_btn.setText("[INFO] loading images...")
        imagePaths = sorted(list(paths.list_images(self.directory.text())))
        images = []

        for imagePath in imagePaths:
            image = cv2.imread(imagePath)
            images.append(image)

        self.stitch_btn.setText("[INFO] stitching images...")
        stitcher = cv2.createStitcher() if imutils.is_cv3() else cv2.Stitcher_create()
        (status, stitched) = stitcher.stitch(images)

        if status == 0:
            if self.crop.currentText() == "YES":
                self.stitch_btn.setText("[INFO] image cropping...")
                stitched = cv2.copyMakeBorder(stitched, 10, 10, 10, 10,
                                              cv2.BORDER_CONSTANT, (0, 0, 0))

                gray = cv2.cvtColor(stitched, cv2.COLOR_BGR2GRAY)
                thresh = cv2.threshold(gray, 0, 255, cv2.THRESH_BINARY)[1]

                cnts = cv2.findContours(thresh.copy(), cv2.RETR_EXTERNAL,
                                        cv2.CHAIN_APPROX_SIMPLE)
                cnts = imutils.grab_contours(cnts)
                c = max(cnts, key=cv2.contourArea)

                mask = np.zeros(thresh.shape, dtype="uint8")
                (x, y, w, h) = cv2.boundingRect(c)
                cv2.rectangle(mask, (x, y), (x + w, y + h), 255, -1)
                minRect = mask.copy()
                sub = mask.copy()

                while cv2.countNonZero(sub) > 0:
                    minRect = cv2.erode(minRect, None)
                    sub = cv2.subtract(minRect, thresh)

                cnts = cv2.findContours(minRect.copy(), cv2.RETR_EXTERNAL,
                                        cv2.CHAIN_APPROX_SIMPLE)
                cnts = imutils.grab_contours(cnts)
                c = max(cnts, key=cv2.contourArea)
                (x, y, w, h) = cv2.boundingRect(c)

                stitched = stitched[y:y + h, x:x + w]

            cv2.imwrite(output_dir, stitched)
            self.stitch_btn.setText("Stitch!")

        else:
            print("[INFO] image stitching failed ({})".format(status))
대망의 스티칭 부분 코드이다.
시프트 알고리즘을 참고하였는데 시프트는 이미지의 회전뿐만 아니라 크기가 바뀔 때에도 이미지의 특징점을 추출할 수 있다.
시프트는 총 4단계의 절차를 통해서 이미지의 특징을 추출하고 그 특징점을 통해서 매칭 한다.
실행 시 아래 UI 창이 뜰 것이다.
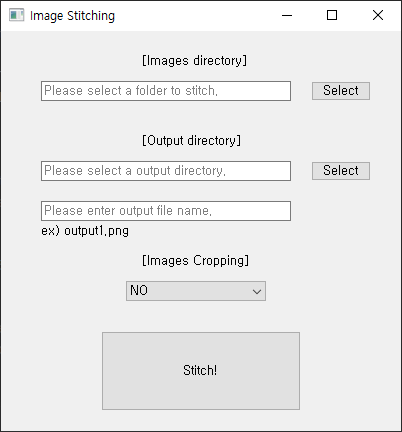
'Images directory'에서 스티칭할 이미지가 있는 폴더를 선택한다. 이미지를 여러 개 선택하는 것이 아닌, 폴더 내부에 있는 이미지들을 선택하여 인식하는 듯하다.
'Output directory'에서는 스티칭될 이미지를 저장할 폴더를 선택한다.
그 아래는 저장할 파일 명과 확장자를 입력한다.
여기서 주의사항은 이미지를 저장할 폴더(Output)를 스티칭할 이미지가 있는 폴더(Input)와 같은 위치로 설정하면 안 된다.
나중에 한 번 더 스티칭할 때 출력 이미지와도 같이 스티칭해서 이미지가 약간 흐려지는 증상을 확인하였다.
직접 촬영한 이미지를 스티칭해보았다.
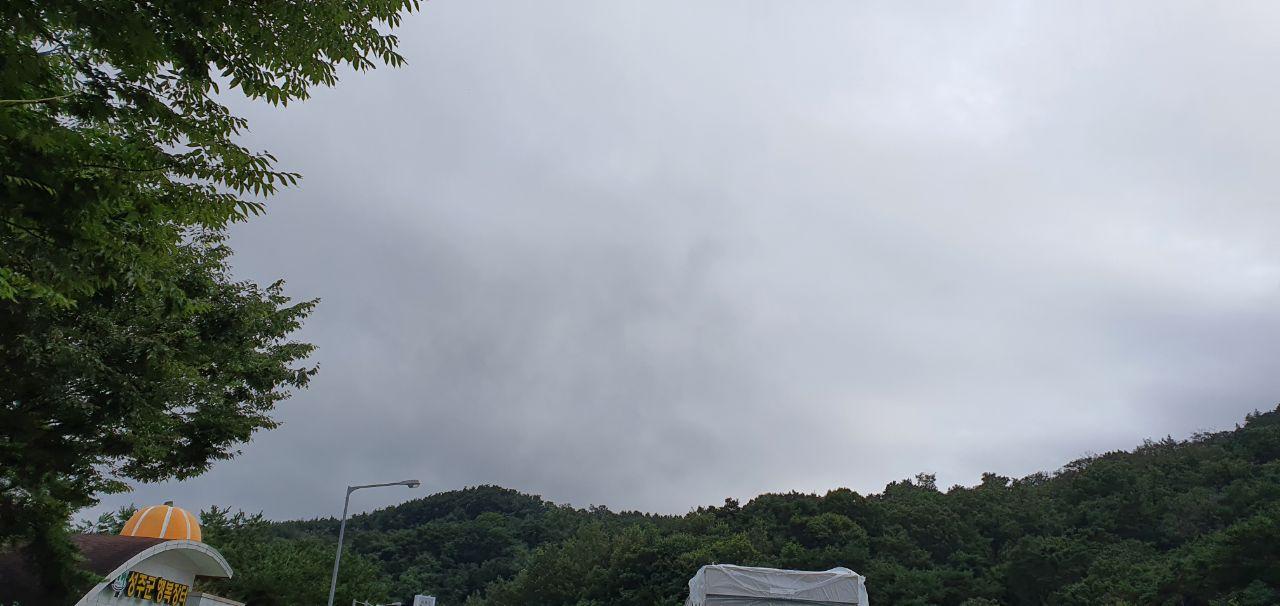

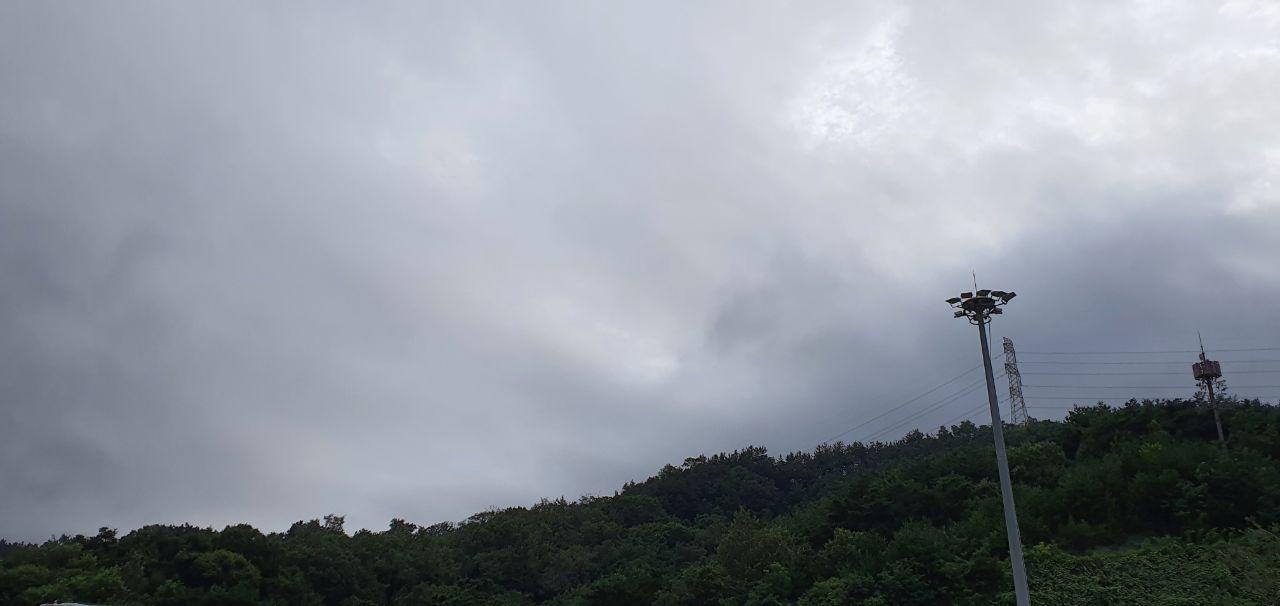
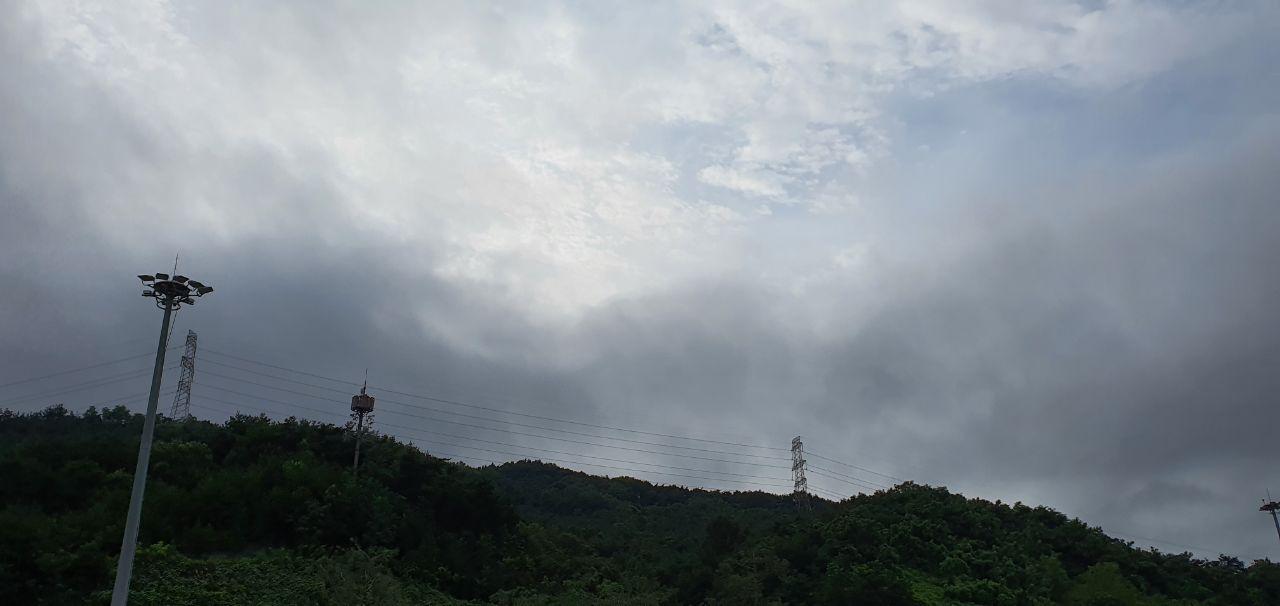
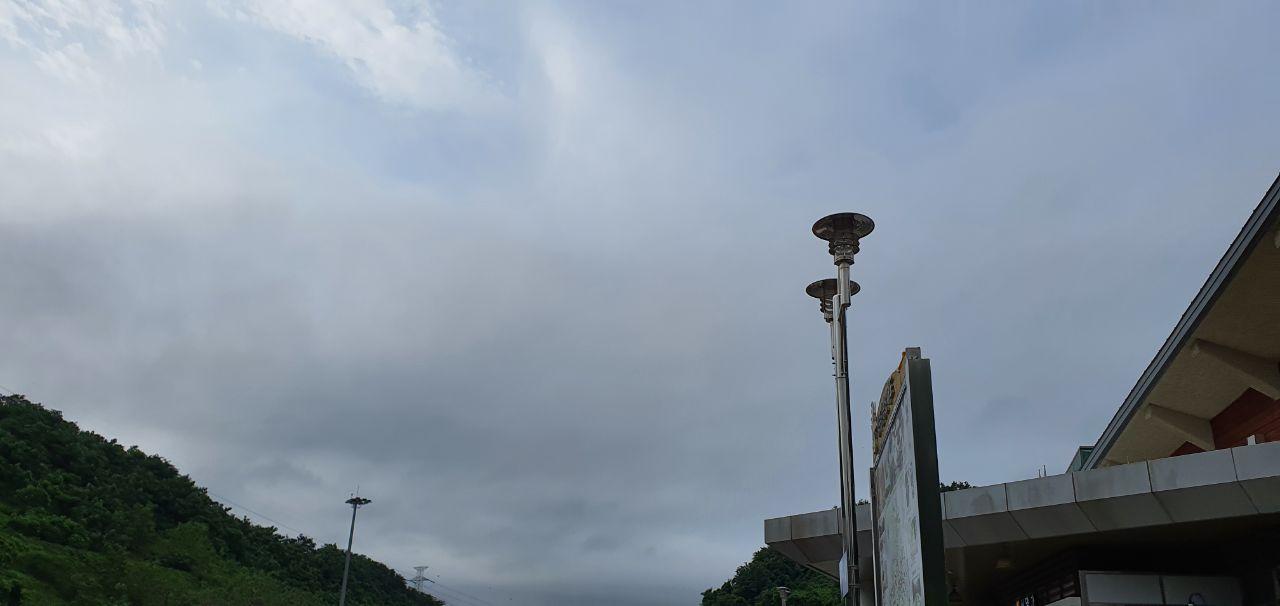

스티칭 결과 -

각각 이미지들의 특징점을 잘 찾아서 6개 이미지 모두 잘 스티칭되었다.
물론 이미지의 특징점을 인식하지 못하면 잘 스티칭되지 않는다.